How to remove and attach Canon EOS cameras lens. |
|
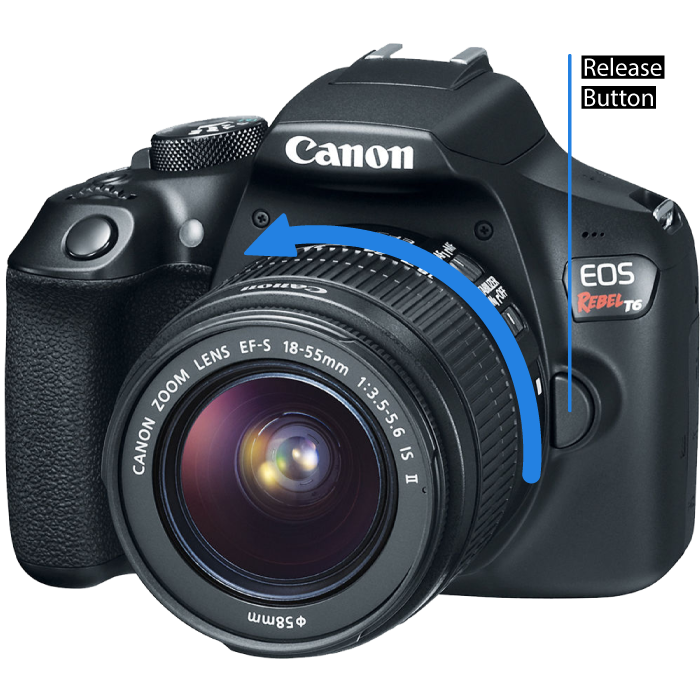
Issue: Cause: 1) Locate the lens-release button on the front of the camera, labeled in the preceding figure; 2) Grip the rear collar of the lens. In other words, hold onto the stationary part of the lens that’s closest to the camera body; 3) Press the lens-release button while turning the lens away from the lens-release button (counterclockwise). You can feel the lens release from the mount at this point. Lift the lens off the mount to remove it;
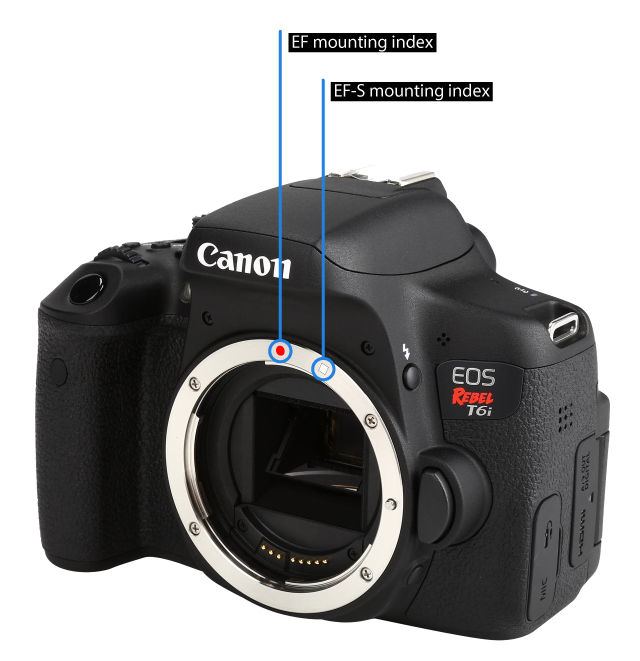
Follow these steps to attach it to the camera body: 1) Locate the proper lens mounting index on the camera body. A mounting index is simply a marker that tells you where to align the lens with the camera body when connecting the two. Your camera has two of these markers — one red and one white 2) Align the mounting index on the lens with the correct one on the camera body 3) Keeping the mounting indexes aligned, position the lens on the camera’s lens mount 4) Turn the lens in a clockwise direction until the lens clicks into place. In other words, turn the lens toward the lens-release button
|