The Process to TWAIN command processes images and transfers them to external application which connected to IDPhoto Processor via TWAIN protocol. As an application in which processed photos will be transferred we use image viewer XnView.
It should be reminded that IDPhoto Processor is an image source in TWAIN connection.
So, we start IDPhoto Processor and select several images in the explorer.
Unlike the rest of the program functions, the Process to TWAIN button and the menu item are disabled.
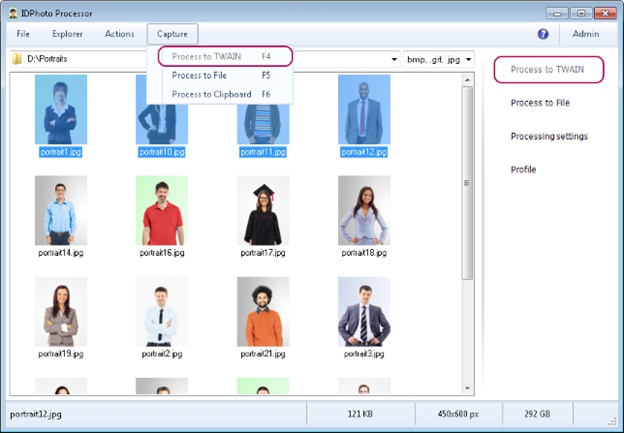
This is right. The possibility to transfer images via TWAIN driver will arise when IDPhoto Processor receives a request from the third-party application for opening TWAIN connection. By this moment, the Process to TWAIN elements will be disabled.
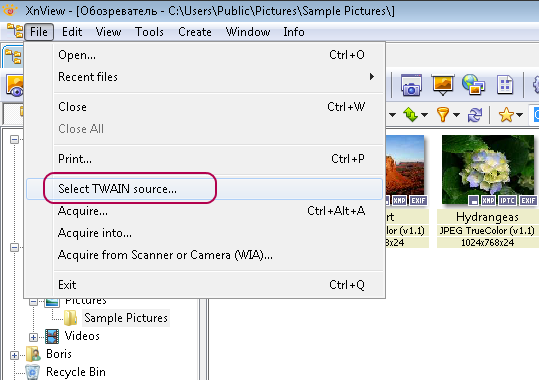
Let's open TWAIN connection and enable Process to TWAIN function. For this purpose, we start XnView, enter File main menu and select Select TWAIN source.
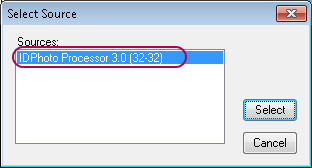
In the appeared Select Source dialogue, we select IDPhoto Processor from the source list.
Then, in the same File menu, we select Acquire.
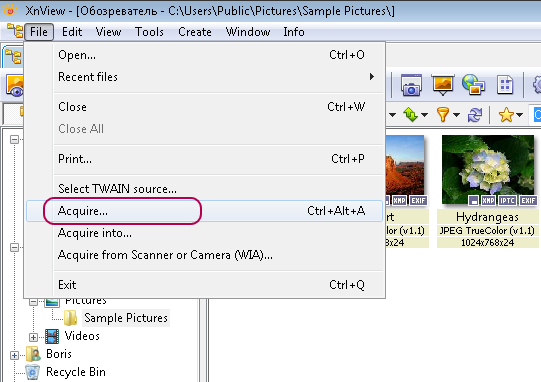
If by that moment, IDPhoto Processor has been closed or minimized to a tray, now it will be started.
We connected to TWAIN driver of IDPhoto Processor via XnView. We move to IDPhoto Processor and select several images in the explorer. Please note that Process to TWAIN menu item and button now have been enabled.

text
Process to TWAIN may be disabled if no images are selected in the explorer.

text
For more details on selecting objects in the explorer, see chapter Explorer.
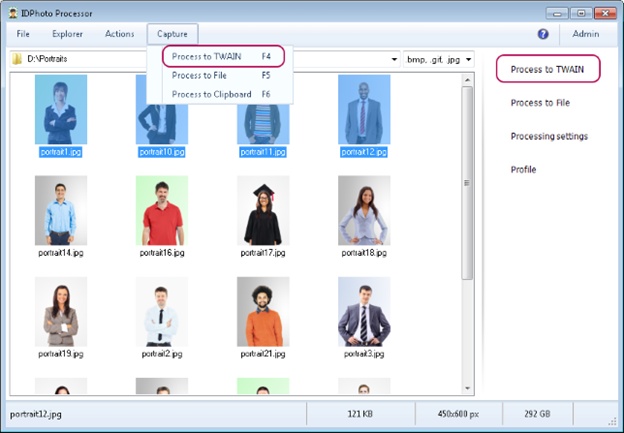
Having selected required images, we start Process to TWAIN.
Process to TWAIN may be started from Capture main menu > Process to TWAIN, from the side menu by clicking Process to TWAIN button, or from the context menu in the explorer.

The Process to TWAIN button from the side menu may be hidden if the application interface is set up in such a way. To make the button visible, enter File menu > Options> General tab and set up Show Process to TWAIN button. For more details on setting of the side menu interface, see chapter Side Menu Interface.
Further course of processing depends on the settings set by the user. Please note that the key processing settings are located in the File main menu > Options > Processing tab.
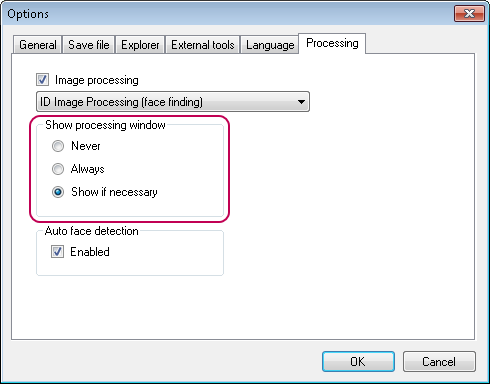
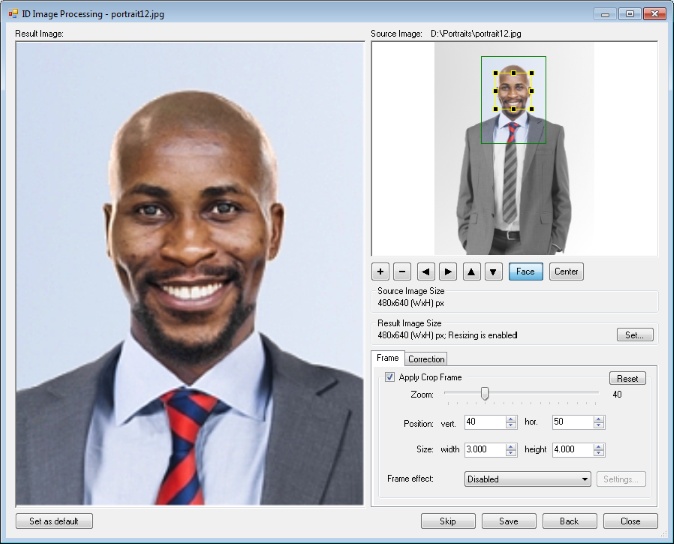
If Always is selected in the settings, then the ID Image Processing dialogue will be called up for every image being processed.
If the dialogue opening setting is set to the Show if necessary value, the dialogue will be opened only if a user's participation is needed for processing the images. The dialogue will not be opened for successfully processed photos.
If the Never option is selected, processing will be carried out without opening the ID Image Processing dialogue. Images that cannot be processed automatically will remain unchanged.
You can read more details on settings and actions on the ID Image Processing dialogue in the General Settings, ID Image Processing dialogue, and Actions chapters.
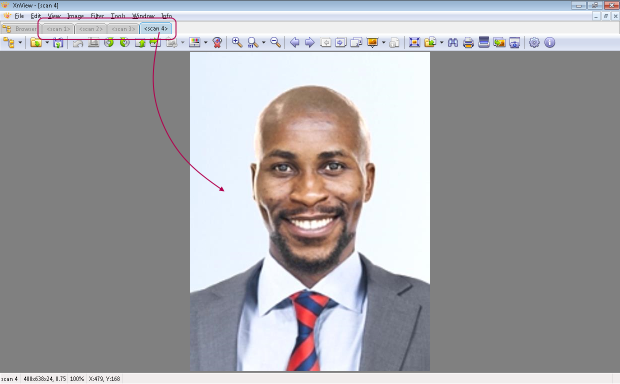
After completing the processing procedure, we return to XnView and look at the result of the command Process to TWAIN. As can be seen on the picture, the images are successfully processed and transferred to the viewer.
The process of connecting to other applications via TWAIN driver is similar to that, exemplified by XnView. It is noteworthy that applications may close the channel for TWAIN driver after image transfer is completed. Because of this, Process to TWAIN button will be disabled. To enable it, you need to repeat the process of selecting a scanner.
XnView can also accept several images at a time, as it was demonstrated in the example. Not all the applications support this option. For some applications, you have to start the processing for each separate image.
Please note that IDPhoto Processor is set by default as to be minimized to tray after processing completion. More details on settings regulating processing completion may be found in the Processing Completion section.