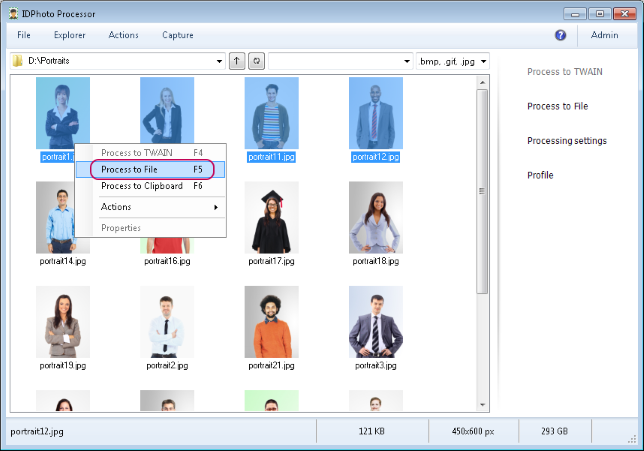
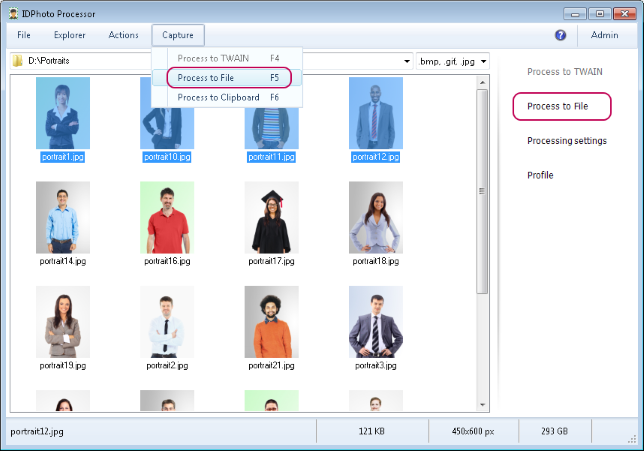
The Process to File command carries out processing of files and subfolders with their subsequent saving to the specified place on the drive. The command can be started from the Capture main menu > Process to File, from the side menu by pressing the Process to File button or from the context menu in the explorer.

The Process to File button may be hidden in the side menu, if the application interface is set up in such the way. To make the button visible, enter the File menu > Options > General tab and set the Show Process to File button setting. More details on the setting of side menu interface may be found in the Side Menu Interface chapter.
text

text
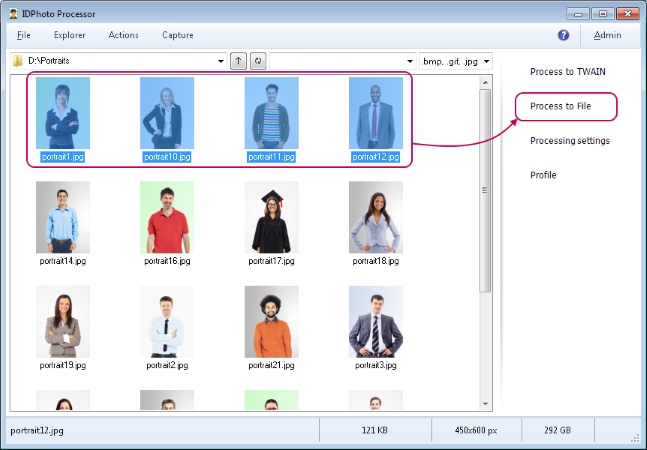
If the Process to File item is not active, select one or several images in the explorer.
So, select one or several images and start up Process to File in any way.
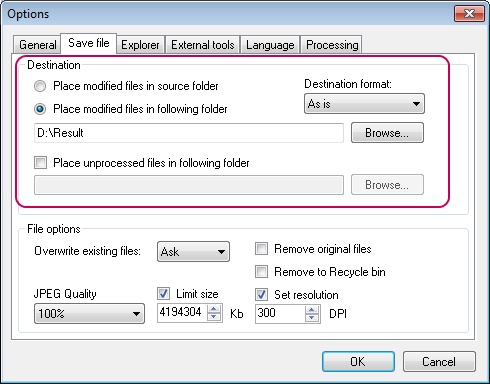
Further course of processing depends on the settings set by the user. Please note that the key processing settings are located in the File main menu > Options > Processing tab.
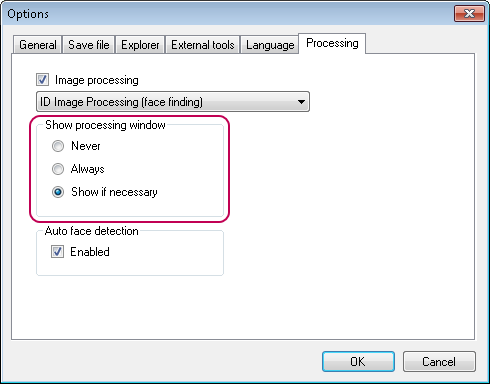
If Always is selected in the settings, then the ID Image Processing dialogue will be called up for every image being processed.
If the dialogue opening setting is set to the Show if necessary value, the dialogue will be opened only if a user's participation is needed for processing the images. The dialogue will not be opened for successfully processed photos.
If the Never option is selected, processing will be carried out without opening the ID Image Processing dialogue. Images that cannot be processed automatically will remain unchanged.
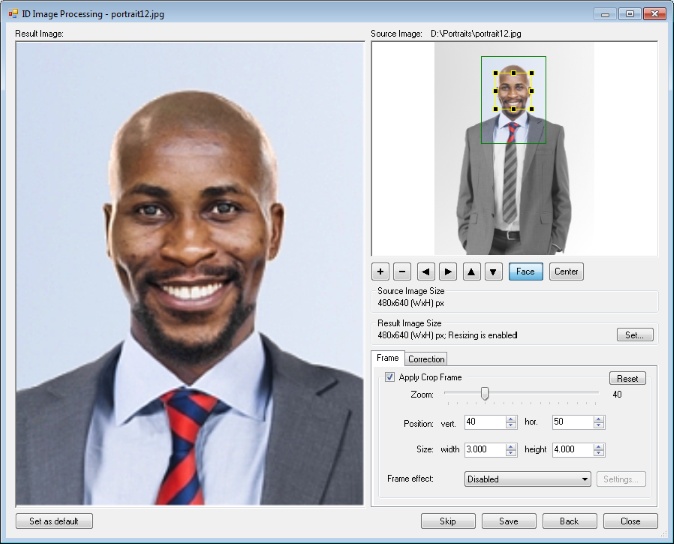
You can read more details on settings and actions on the ID Image Processing dialogue in the General Settings, ID Image Processing dialogue, and Actions chapters.
Thus, with the default settings, the application will display a message with statistics upon the process completion. The message informs on the successful completion of the process as well as on the number of images processed, on the number of those processed successfully, those on which no face has been detected, and those for which processing has been cancelled.
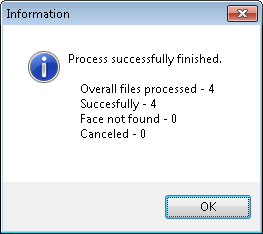
The display of the message with statistics is regulated with Show Processing Statistics setting located in File main menu > Options > Explorer tab.
If the processing has been started for a single image, such a message will not be displayed.
Then, to see the processed images we enter the folder indicated in saving settings. Please note that the saving settings are located in the File menu > Options > Save file tab > Destination section.
In this example, 4 images have been sent to processing.
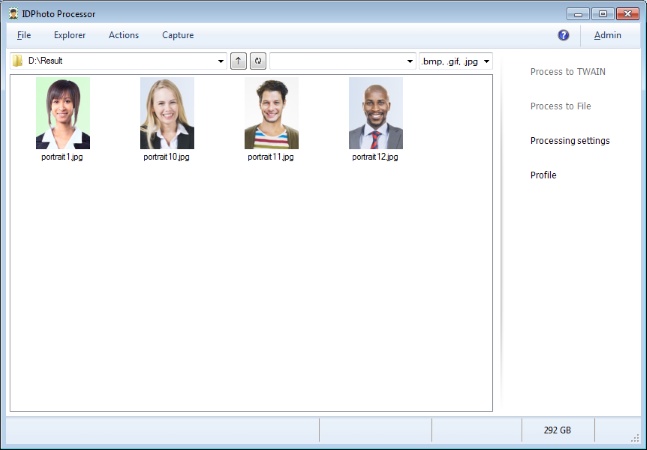
The result looks like this. You can see in the picture that all photos have been successfully processed and saved.
You should be reminded that by default IDPhoto Processor is set as to be minimized to tray after the processing completion. More details on settings regulating processing completion may be found in the Processing Completion chapter.
The contents of the chapter are as follows:
Processing of Folders with Subfolders