The voice features allow user to manage image shooting and processing remotely. In other words, after frame setting you can freely move giving voice commands and inPhoto Capture PS will recognize and execute them.

text
To use voice features, connect a microphone to your PC.
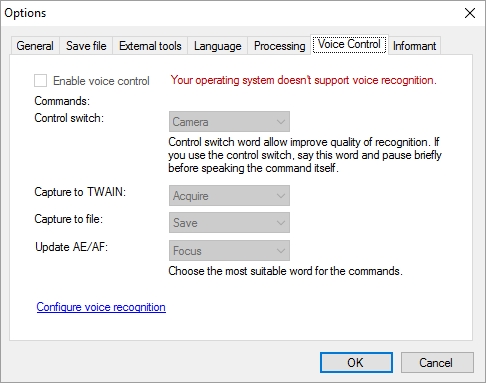
Please note that the voice features are only available if the language your system locale is English. The Microsoft Windows system doesn`t support speech recognition for other languages. If your system locale is not English, you will see the follow message "Your operating system doesn`t support voice recognition" opposite to the Enable voice control setting and the setting itself will not be activated.
At the time of writing of the User Guide, English is included in the Windows Enterprise and Windows Ultimate packages. You can add English In Windows 10 for any operating system modifications. How to identify the language of your system locale and how to change, it you can find it out on the Microsoft website by clicking on the following links: http://windows.microsoft.com/en-us/windows/change-system-locale#1TC=windows-7 - for Windows 7, http://windows.microsoft.com/en-us/windows/change-system-locale#1TC=windows-vista - for Windows Vista and http://windows.microsoft.com/en-us/windows-10/how-to-add-an-input-language-to-your-pc#v1h=tab01 - for Windows 10.
Then, we are describing how to use voice features step-by-step.
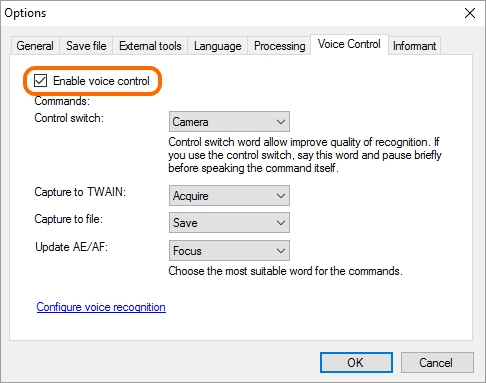
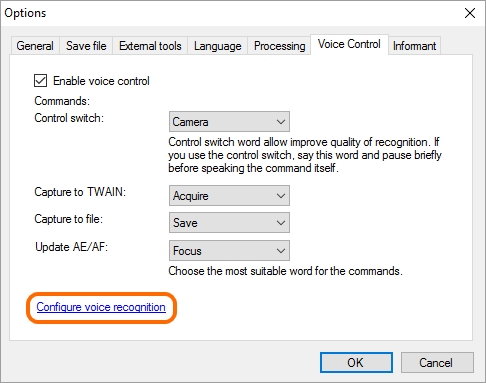
Step 1. Switch on the Enable voice control setting. After that, all fields of the tab are activated.
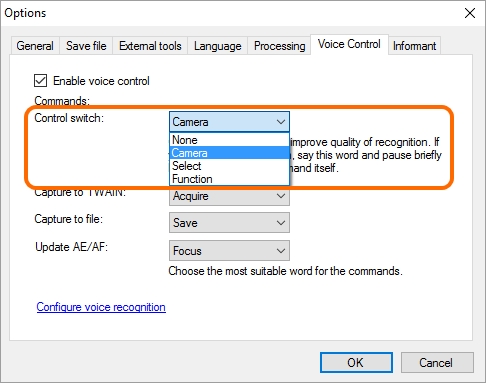
Step 2. The tab then contains the possible commands. There are a list of command launching words against each command.
The Control switch command helps to improve recognition of other commands. So, if a control switch is on, the words specified for other commands will be recognized by the program only after the control switch word sounding. If you say the launched word and don`t say the control switch before it in everyday speech, the word will not be considered by the program as the voice command.
If you are not convenient to use the control word you can select the None value. In this case, you just have to say one word to launch the corresponding command.
More details on the Capture to TWAIN and Capture to File commands you may be found out in the Processing chapter, the Capture to TWAIN and the Capture to File sections.
The Update AE/AF command is described in the Camera chapter, the Update AE/AF section.
Then, select a launching word for each command that you intend to use. For this reason, say the launching word and evaluate how it is convenient to use.
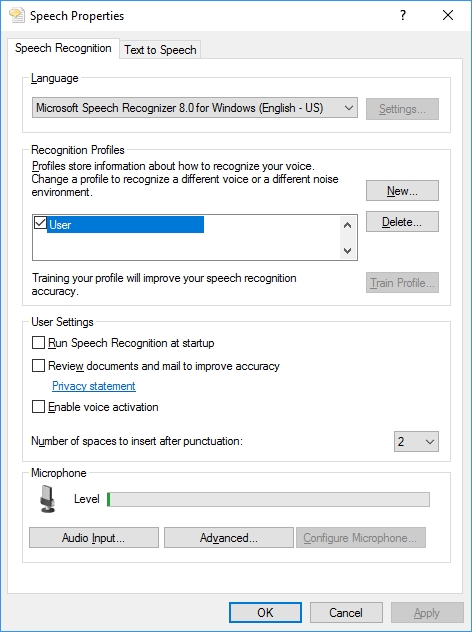
Step 3. At this step, we are describing how to configure and test your microphone.
The Configure voice recognition link located at the bottom of the tab opens the Speech Properties dialogue.
You can select the desired microphone in the dialogue (if several devices are connected) to check that it works properly, to listen to your message recorded through the selected device, to change the microphone settings.
So, change the microphone settings if required, make sure the microphone transfers your voice messages to the operating system and then proceed to the next step.
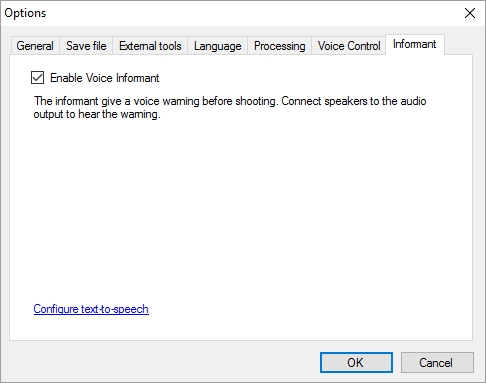
Step 4. To be sure the voice command has been recognized and implemented, it is convenient to use the voice commands together with the voice informant. The voice informant displays a countdown panel for shooting and transfers the "Attention! Look in to the camera. Shooting!" voice message to the playback device. Thus, if the voice informant is counting down, it means your voice command is implementing.

text
The informant is launched only just before shooting. It will therefore be active during implementation of the Capture to TWAIN and Capture to File commands. Please note that the informant will not be applied to the Update AE/AF command.
More details on the voice informant may be found in the Voice Informant section. At this stage, you are recommended to read about it and switch it on. However, switching on isn`t a mandatory action for use of the voice commands.
Step 5. When your microphone is ready, the launching words are selected, the voice informant is on, say your voice command and check out the result of its implementation.
So, say one of the launching words loud and clear, for example, Save. If the voice informant is on, you will hear a message and see a countdown timer in the program window; after that, the image will be captured and then processing will be launched. The program can open the dialogue of image processing during processing. That cases the dialogue will be called up and that actions you can select therein are described in more details in the General Settings, ID Image Processing dialogue and Actions sections.
text
If your voice command has not been recognized, use an alternative launching word or correct the microphone settings.
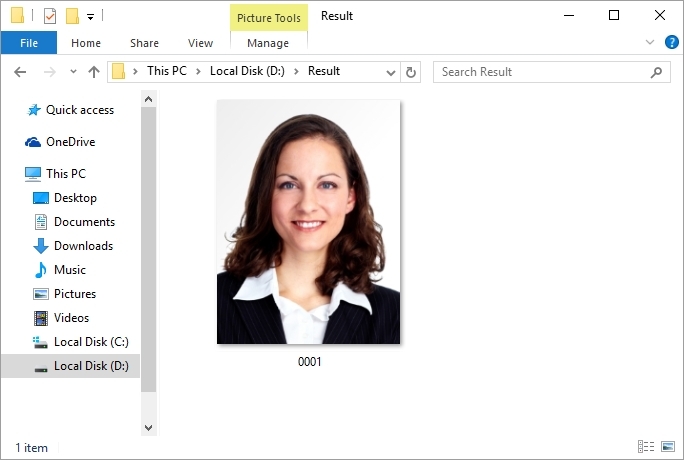
Step 6. Let`s check the command execution result. We have said the Save word that launched the Capture to File command, therefore the image should be captured, processed and saved in the specified folder on the disk.
text
The folder into which the program will save processed images you may be entered in the main menu: Options > General > Save file > Folder to save images.
The command has been successfully executed as shown in the picture below: the processed image is located in the folder.