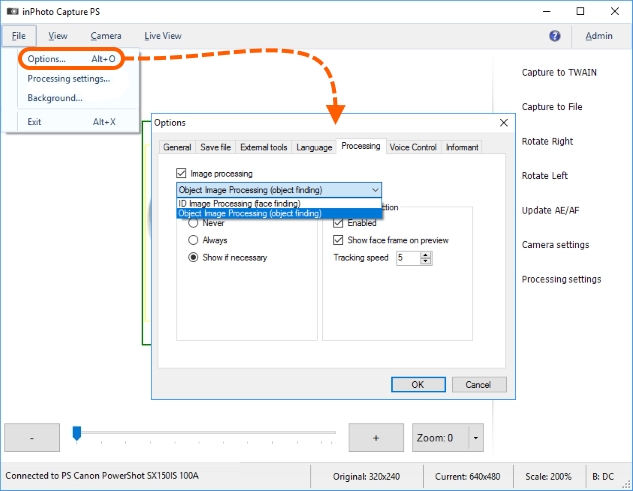
Step 1. Please switch the processing mode for the application to search for an object, not a face. For this purpose, please enter the main menu File > Options > the Processing tab and choose from the list the Object Image Processing (object finding) value.
Step 2. You can use a test image to set the image parameters before processing and then correct them during the processing of the actual image.
The parameters you set for the test image will be considered as the parameters by default and will be applied to all object images.
The parameters you will correct during processing will be applied only to the current processed image.
Step 2.1 To set the parameters of the image before processing, in the File main menu or in the side menu, choose the Processing settings item.
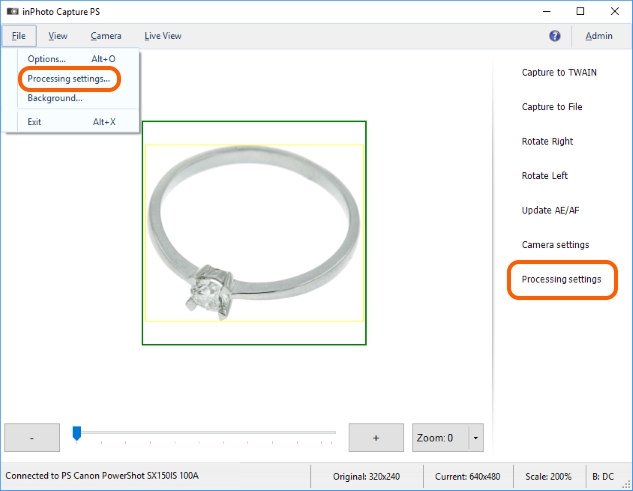
In the Object Image Processing dialogue window that appeared, set the parameters of the image according to your needs.
In our example, we will reduce the scale to save more space around the object. The side to side ratio will be kept as 1 : 1 to keep the square form of the image. We will also set the maximum size of the image of 1000х1000 pixels.
Please get more details on the settings of the frame, the correction and size of the image in Frame Setting, Image Correction, Processed Image Size.
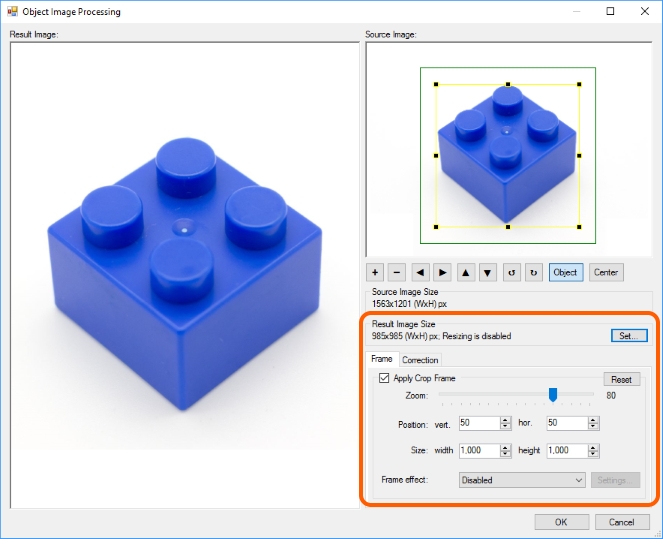
After pressing OK in the dialogue window, the changes of the frame settings will be shown in the preview window.
Please get more details on showing settings in the preview window in the Chapter 4. Preview.
Step 2.2 To have a possibility of correcting the image settings during processing, please enter the main menu File > Options > the Processing tag and switch the Show processing window setting to Always. Now, once the image capturing completed, the Object Image Processing dialogue window will always be shown.
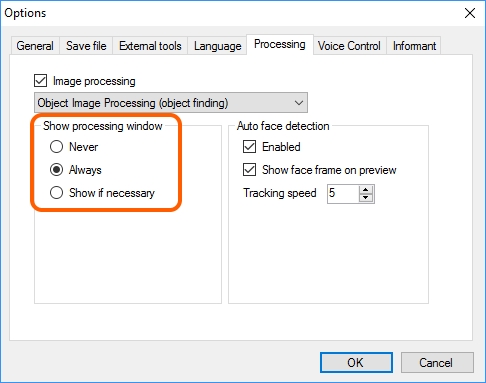
If you wish to launch the image processing in a more automatic mode and do not wish opening a dialogue window for each image, please do not change this setting.
Please get more details on the Show processing window setting in General Settings.
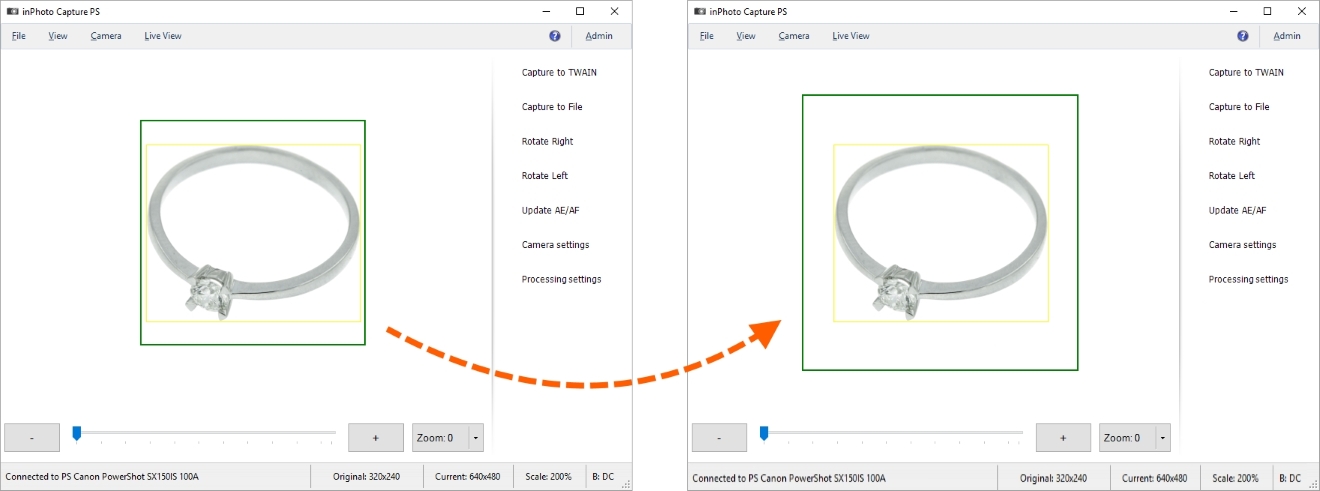
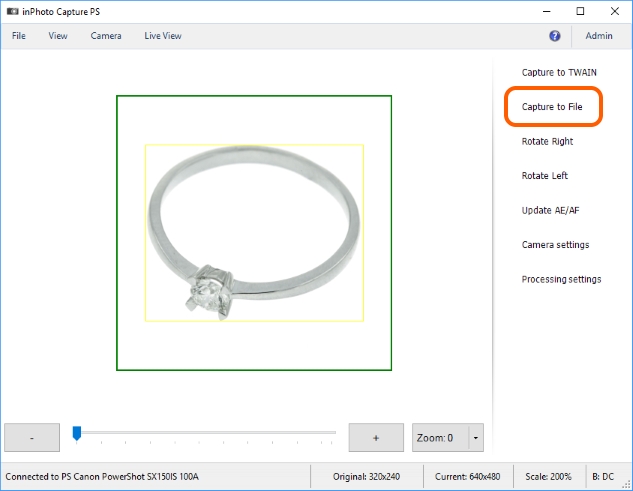
Step 3. Capture the image with any of the following commands: Capture TWAIN, Capture to File or Capture to Clipboard. For the purpose of our example, we use capturing into a file.
Each of the image capturing commands is described in details in the Chapter 7. Processing.
The file saving parameters are described in the Image Saving section.
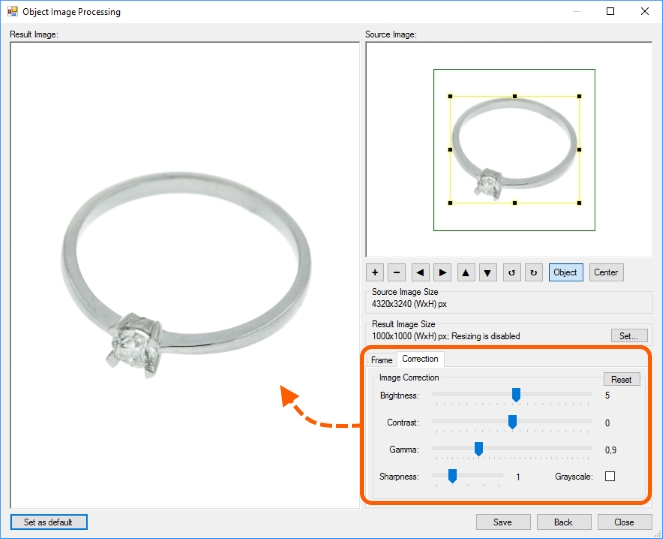
Step 4. In the Step 2.2, we have assigned Always to the Show processing window setting, and so, after capturing the image, inPhoto Capture PS will open the dialogue window of processing an object image.
There, you can correct the settings defined earlier. As the image is already captured, the application may show not only the frame settings, but also the settings of size and correction. How will the image look after processing with the current settings is shown in the Result Image form. Any change of the settings is immediately shown in the Result Image form.
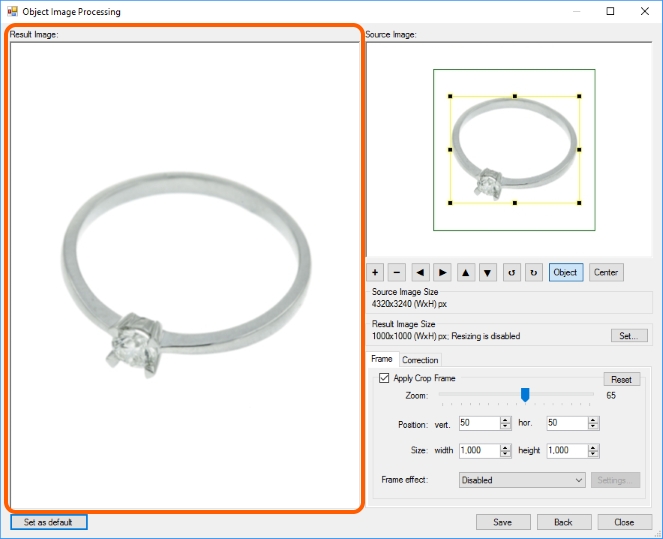
In our example, the initial image of the ring is some fuzzy, so let's add brightness and sharpness, and also reduce latitude.
Please get more details on the correction settings in Image Correction.
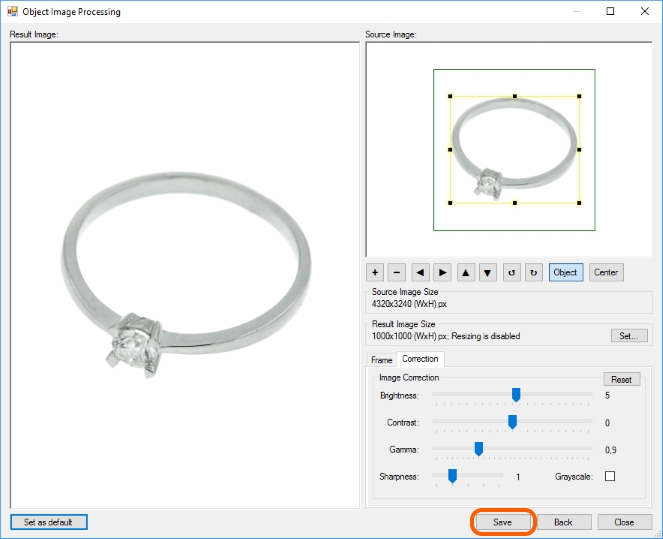
Then, press the Save button.
Please get more details on the designation of the buttons in Actions.
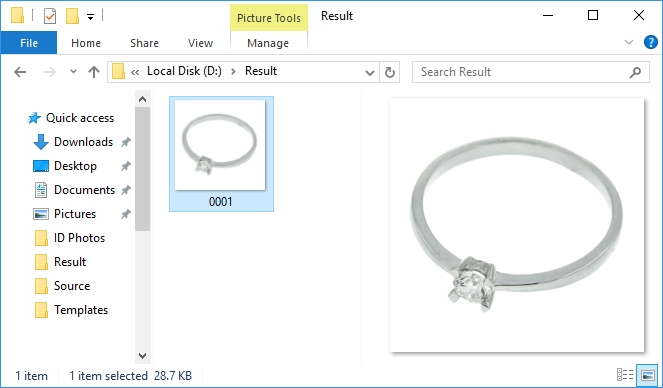
Step 5. Check the result. In our example, inPhoto Capture PS has captured an image from camera, identified the object, processed the image according to our settings, assigned it a number, and saved it into the pre-defined place on the disk.