The Next Camera Auto command automatically switches the camera once image capturing is completed. This option helps a lot if you need to make a picture from all the cameras one by one.
In the example hereafter, we will show you step by step how the automatic switching works.
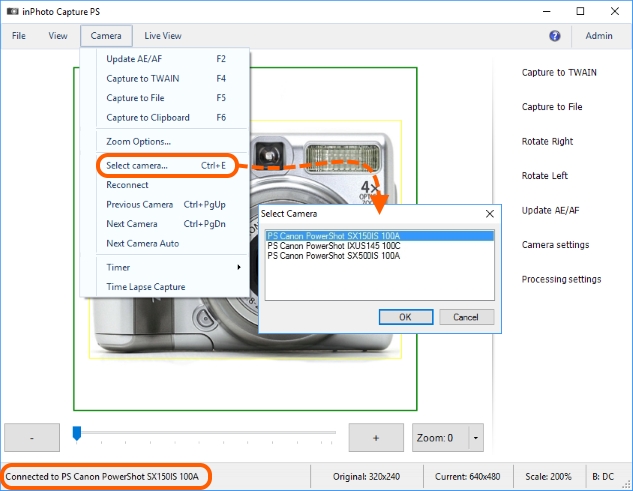
Step 1. Connect several cameras to a PC with inPhoto Capture PS installed.

The way of preparing a camera for working with inPhoto Capture PS is described in the Memory Card Preparation chapter.
The way of connecting your camera to a PC and handing over the control to inPhoto Capture PS is described in Camera Connection.
Step 2. Run inPhoto Capture PS. The application will automatically start controlling one of the cameras. The image of this camera will be shown in the preview window. The rest cameras will be initialized and added to the list of cameras to choose. Please see Camera Selection to get more details. The order of cameras in the list depends on how your PC assigns numbers to the USB ports which the cameras are connected to.
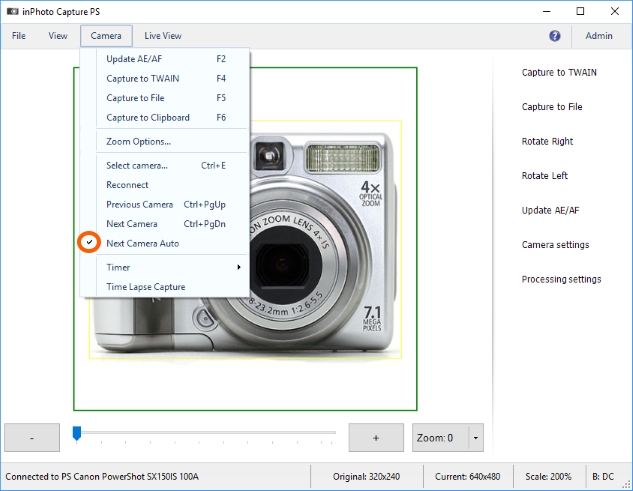
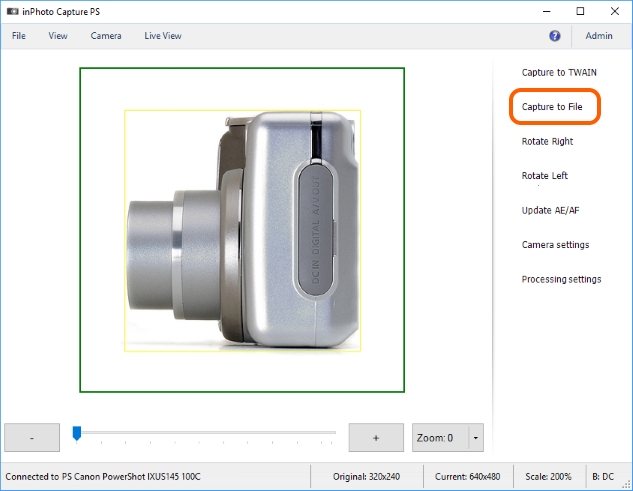
Step 3. Enter the Camera main menu and activate the Next Camera Auto option.
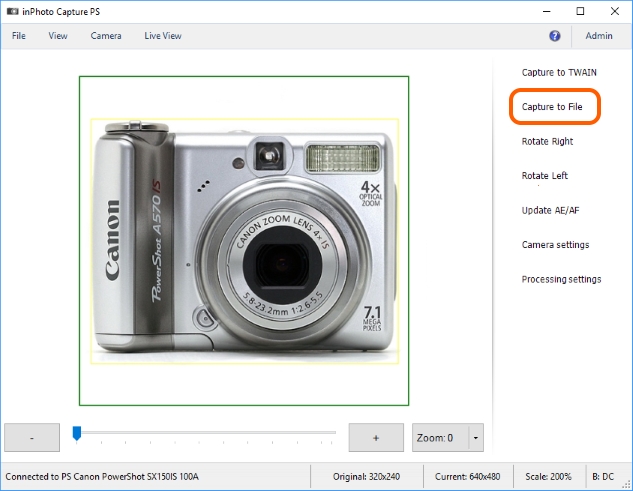
Step 4. Capture the image with any of the following commands: Capture TWAIN, Capture to File or Capture to Clipboard. For the purpose of our example, we use Capture to File.
The image capturing commands are described in details in the Chapter 7. Processing.
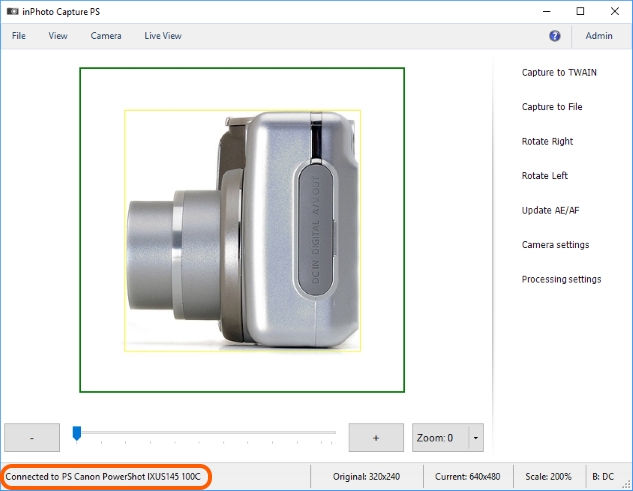
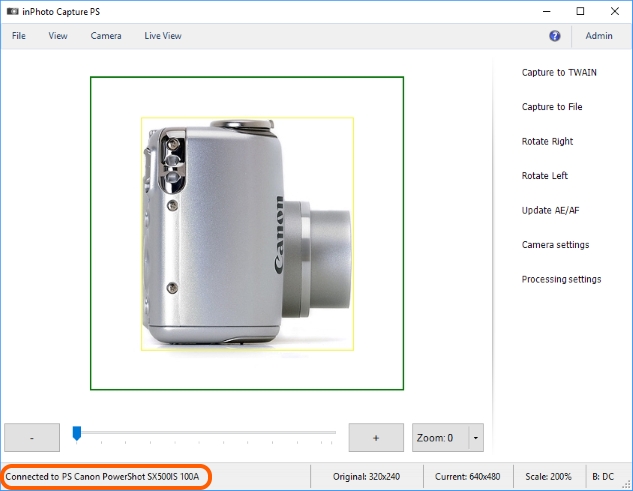
Step 5. Once the image is captured, inPhoto Capture PS will automatically take control over the next camera. You will be able to understand that there has been a switching to the second camera by change of the image in the preview window and by information placed in the status bar.
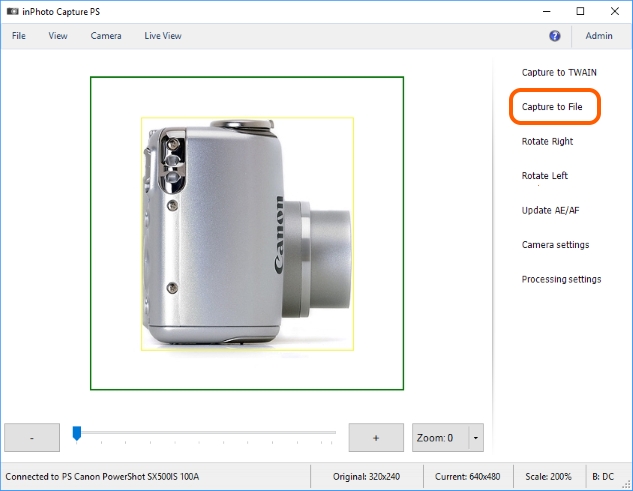
Step 6. Capture the image from the second camera by repeating the Step 4.
Step 7. Once the image is captured, the application will activate the next (third) camera. The image in the preview window and the information in the status bar will be changed.
Step 8. Capture the image from the third camera by repeating the Step 4.
Once the image is captured, the application will switch the camera again. We have 3 cameras in total, so the next activated camera will be the one activated first.
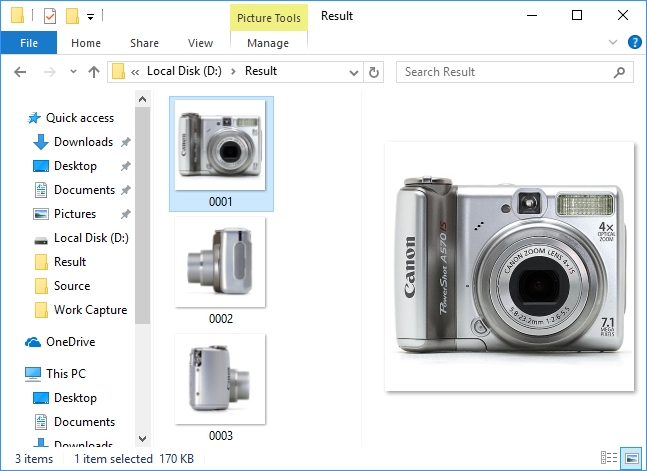
Step 9. Let's check the result. Here below you can see that, as we wished, the object image has been captured with the cameras one by one, then processed and saved.
Addition
•When using the Автоперехода option, it's convenient to also use the voice activation. It will let you be close to the object being shot and control the image capturing process remotely using voice commands. Please see the Chapter 8. Voice Control to get more details.
•If you need to make automatic both camera switching and image capturing, you can use the Автопереход option together with the Time Lapse Capture option. In this case, the application will wait for the pre-defined time after camera switching, and then capture the image. Please see Time Lapse Capture to get more details.