To install the application module on the memory card, you need the following:
1. The SDHS or SDXS card or the card of another type supported by your camera model. The card size may range from 64Mb to 32Gb.
2. A card reader compatible with your memory card.
Step 1.
Start the card preparation wizard.
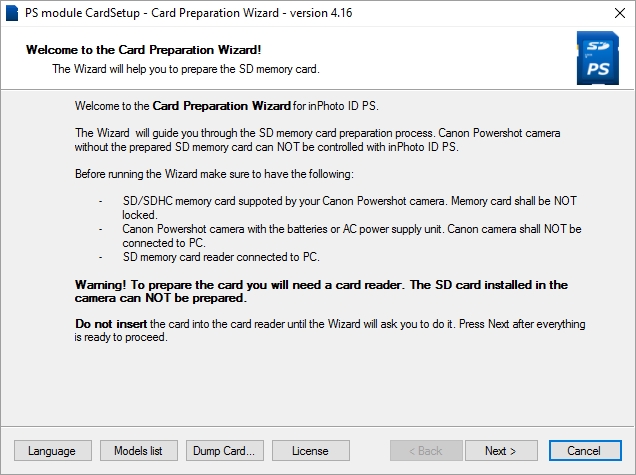
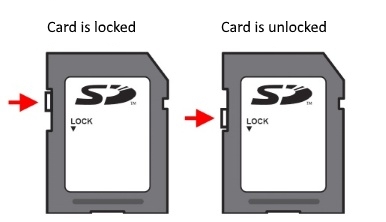
Make sure that the memory card is unlocked.

text
The lock switch of the unlocked card should be in the position opposite to the "Lock" mark. If your card is locked, unlock it by turning the switch to the required position. The picture below shows some examples of unlocked and locked memory cards.
Do not insert the card into the card reader before the wizard asks you to do it!
Disconnect the camera from the PC.
Press the Next button.
Step 2.
At this step, the wizard will ask you to make a test shot onto the memory card in order to run the compatibility test for your model of the camera.
Insert the memory card into the camera. Switch the camera on and make a single shot.
text

text
After the shot has been made, the wizard will identify your camera model and its software (firmware) version. The application module will work correctly only if it corresponds to the camera model and firmware version.
text
If several shots are saved on the card, the wizard uses the last entry (determined by date and time of day) to identify the camera model.
text
Please note that several cameras of the same model may have different firmware versions. If you are preparing memory cards for several cameras, we advise you to make a test shot for each one of them.
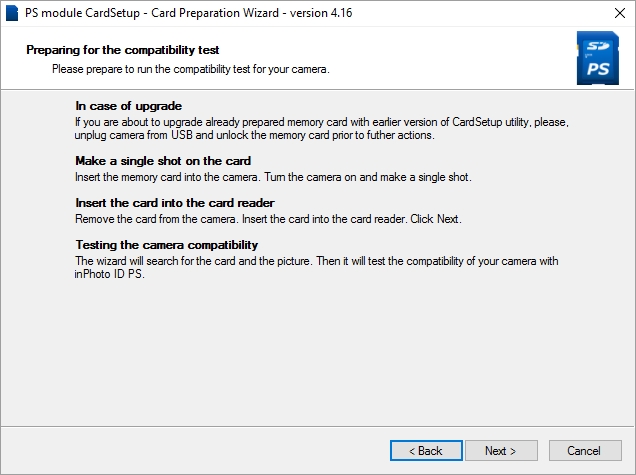
Remove the memory card from the camera and insert it into the card reader.
Press the Next button.
If you have no possibility to make a test shot but you need to prepare the card, you can continue installation of the PS Module and manually select the camera model from the list. In this case, insert the card into the reader and press the Next button.
Step 3.
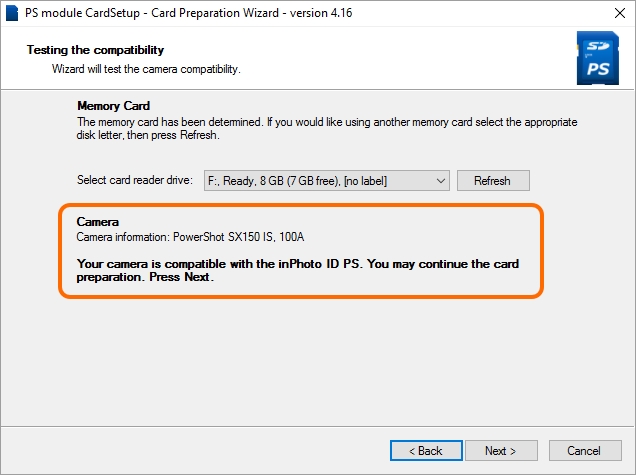
At this step, the wizard tests the compatibility of your camera model with inPhoto Capture PS.
If the wizard has identified the camera model and displayed the message that the camera is compatible with inPhoto Capture PS, simply press the Next button.
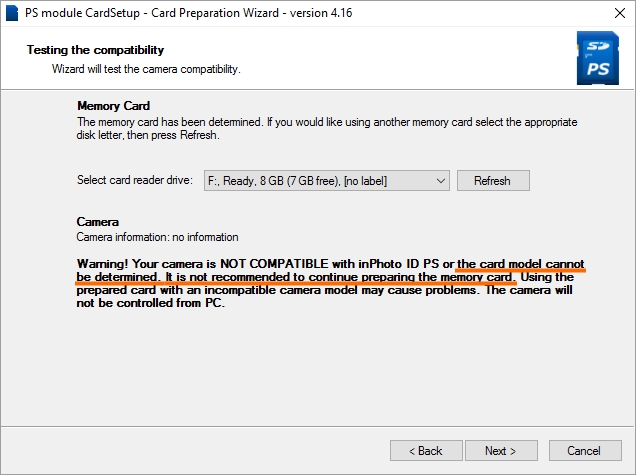
If there is no test shot on the card, the wizard will inform you that the camera model has not been identified and proceeding with the preparation of the card is not recommended. Then, you may abort preparation of the card, make a test shot and then proceed with the module installation or continue the installation without a test shot by selecting the camera model and firmware from the list.
If you have decided to abort preparation of the card, press the Cancel button, to proceed, press the Next button.
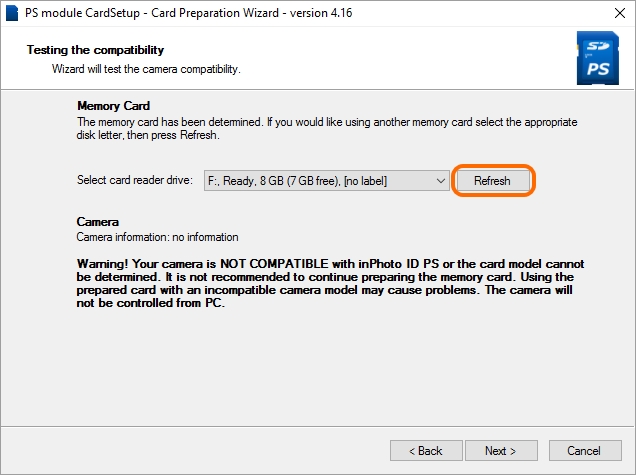
If the test shot has been made, but the wizard has not identified the camera model, and you are sure that this model is included into the list of the compatible cameras, it is likely that the problem lies with the card. Clean the card completely. Remove the card from the card reader and insert it into the camera. Make a test shot. Remove the card from the camera and re-insert it into the card reader. Make sure that the shot made has been saved on the memory card. Run the compatibility test in the wizard once again by pressing the Refresh button.
Step 3.1
The wizard will move to this step only in if there is no test shot on the card.
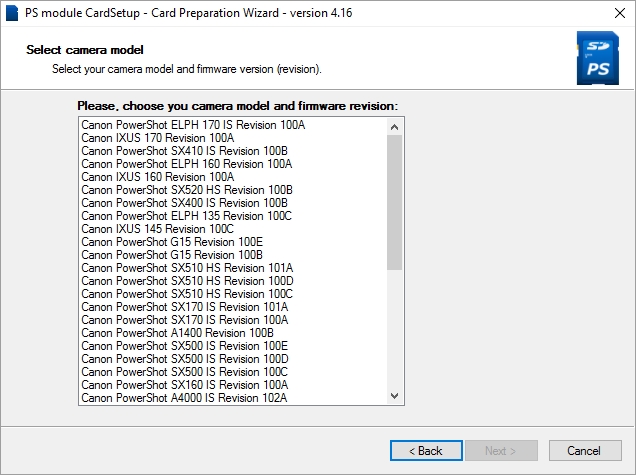
Select your camera model and firmware version from the list.
The camera name selected from list must be the same as your camera name. If your camera name or camera name selected from list differ even one letter or number you will install the Module PS that suits another camera. In this case the Module PS will not run. Please, be careful when choosing the camera!
Press the Next button.
Step 4.
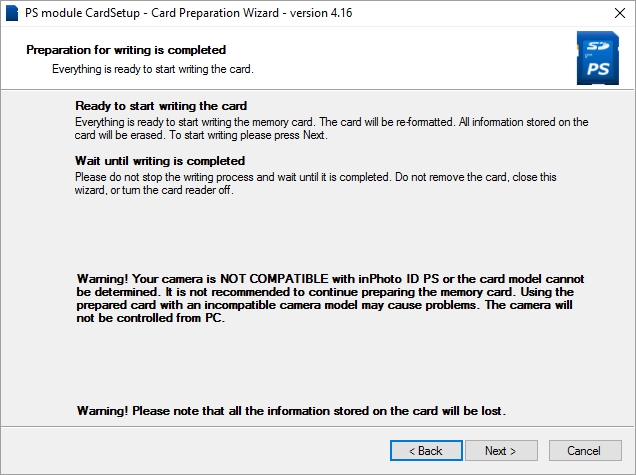
At this step, the wizard informs you that everything is ready for recording.
Make sure there is no data on the memory card as, during the module recording, the card will be formatted and all the data stored on it will be removed.
If you perform installation using the test shot, the wizard window will look like as shown in the picture below. In this case, simply press the Next button.

If you preform the installation without a test shot, the wizard window will once more display the warning that the camera model has not been identified and it is not recommended to proceed with the installation. If you are sure you have selected the correct model and firmware of the camera, press the Next button to proceed with the installation. To abort the installation, press the Cancel button.
Press the Next button.
Step 5.
At this step, the wizard performs recording of data onto the card.
Please wait for completion of the recording process. Do not interrupt the installation process. Do not turn the card reader off or remove the memory card.
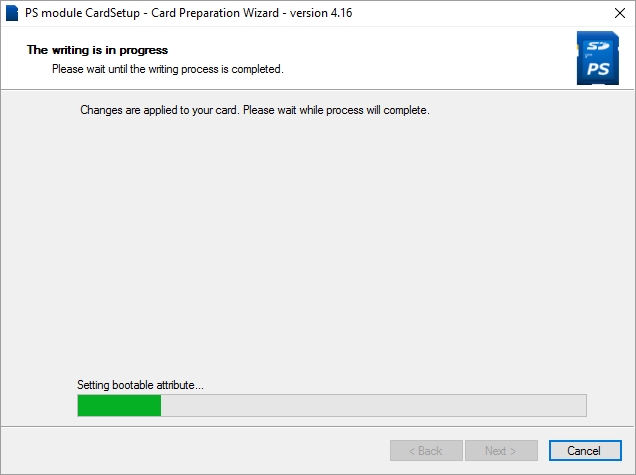
After the data recording is completed, the wizard will automatically move to the next step.
Step 6.
At this step, the wizard informs you that the PS Module has been successfully recorded on the memory card.
Remove the card from the card reader and lock the card. An animated image is put into the wizard window to show how to lock the card.
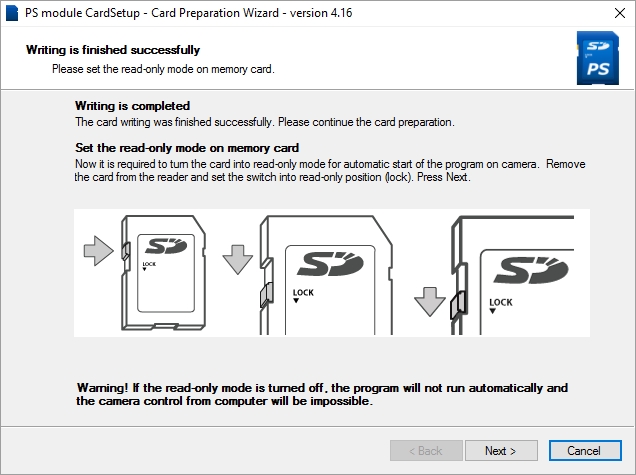
PS Module will be able to start automatically and transfer camera control to inPhoto Capture PS only if the memory card is locked.
Press the Next button.
Step 7.
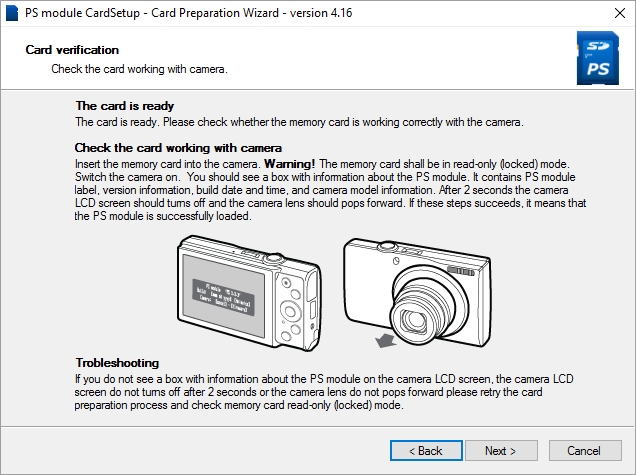
The memory card is ready to work. At this step, you have to check the correct functioning of the memory card.
Make sure that the camera is switched to the automatic (AUTO) or program mode (P).
 Depending on the camera model, the mode is switched either using the mode dial or from the camera menu. If the mode is set from the camera menu, it should be switched before the memory card with the application module is inserted into the camera.
Remove the memory card from the card reader and insert it into the camera.
Switch the camera on.
If the application module has started up and run correctly, you shall see a message on the camera screen with information on the PS Module. In 2 seconds approximately, the camera screen will go off and the camera lens will advance, meaning the module has been successfully set up and the camera control is passed to inPhoto Capture PS.
If during the switch-on, the camera has not performed the actions described above, this can be due to two reasons: either the memory card is not locked or the installed module does not fit this camera.
If the lens does not extend during switching the camera on and the preview shows a black screen with the No image text, then the memory card is not locked. In this case, switch the camera off, remove the memory card, lock it as described in the previous step, re-insert the card into the camera, and switch the camera on.
If the camera does not switch on, i.e. when you press the On button, the camera does not react, then the installed module does not fit this camera model. In this case, remove the memory card, unlock it, insert the card into the card reader, delete all files from the memory card, re-insert the card into the camera, make a test shot, and re-perform the module installation. If you have installed the PS Module without making a test shot and have chosen the camera model manually, then it is likely that the camera model has been chosen incorrectly. In this case, clean the memory card and re-perform the module installation with choosing the correct camera model.

Please note that if the camera into which the memory card with improper PS Module has been inserted does not switch on, there are no modifications, and particularly any damage, in the camera. As soon as you remove the memory card with improper module from the camera, the camera will continue functioning in normal mode.
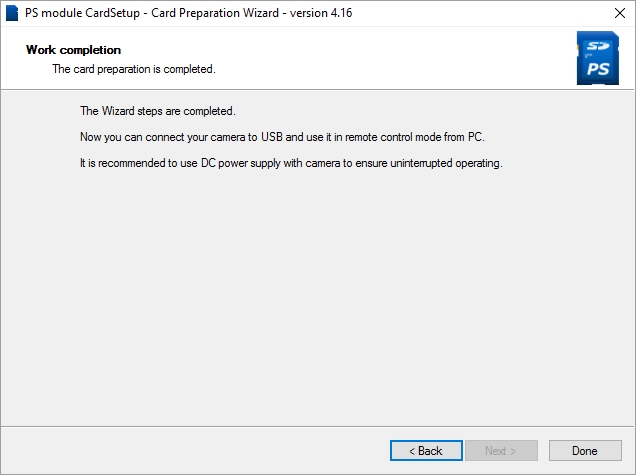
Step 8.
At the last step, the wizard informs you that the card preparation has been completed.
To finish the work of the wizard, press the Done button.