In the inPhoto Capture PS application, we use an extended set of camera's settings that allows to set the camera more precisely and get images of quality in some special shooting conditions.
From inPhoto Capture PS, you can set such camera's parameters as time-exposure and aperture, focusing zone, metering type, white balance, ISO, exposure compensation, flash compensation etc.
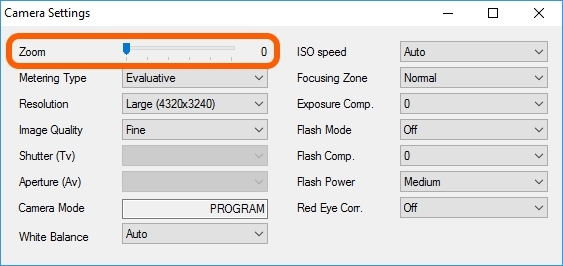
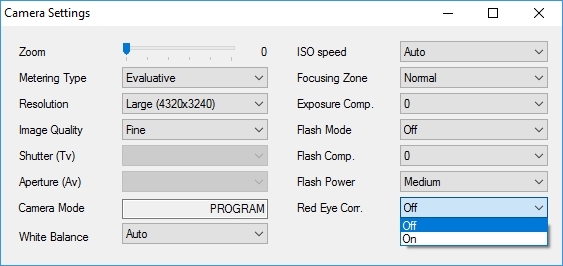
Let us take a detailed look at the camera settings by the example of Canon PowerShot SX150 IS 100A.
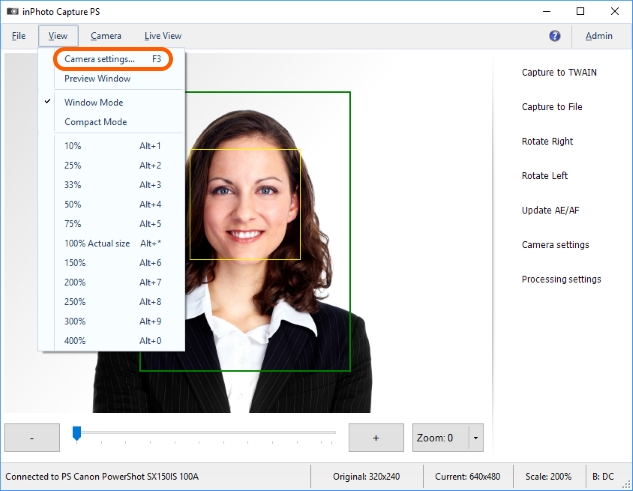
For this purpose, we need to open the camera settings window via the main menu View > Camera settings or with the Camera settings button on the side menu.

Please remember: the button set of the side menu is determined by the settings located in the main window File > Options > the General tab > the User Interface Settings part.
Zoom is the camera lens capacity to make objects to shoot bigger via changing the lens focal length. The enlarging function allows to make target objects "close" or "distant" with no image quality degradation. How many times closer a target object may become is depending on the camera model.
You can control the zoom both via the camera settings window and directly via the application main window. The zoom control panel of the application main window is described in details in the Zoom section. The zoom may also be controlled with shortcuts; that is described in the Zoom Options section.
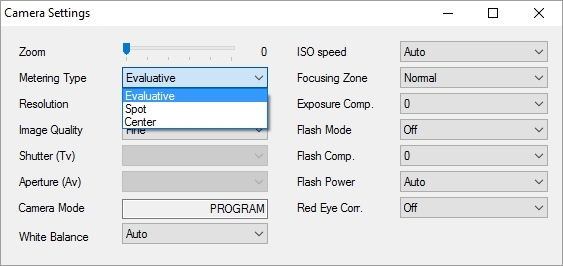
Metering Type will let the photographer to choose the shot zone (scene) on the basis of which the metering will be made.
Metering is a measuring of luminance (brightness) of the objects in the shot. The exposure is calculated on the ground of the metering.
Exposure is an amount of light falling on the camera's matrix during a specific period of time. The exposure is the base for calculating an optimal combination of time-exposure, aperture, and ISO.
Evaluative is an estimation measuring that suits ordinary shooting conditions, including images in the backlight. With such a type of measuring, the shot zone is divided into small zones, then the measurings of all the zones are associated and the average value is determined.
Spot is a point measuring that lets you choose the zone of measuring on the ground of one of the focusing point. It is applied when the luminance of the main object strongly differs from the luminance of the background. The last one is not taken into account with such a type of measuring.
Center is an averaged measuring reflecting all the scene, but making emphasis on the central zone. It is applied when the central zone of the shot is preferred, but the background is also important.
Resolution sets image resolution. In the drop-down list, you can choose one of the possible resolution values. Depending on camera model, the number of values and the respective resolutions may vary.
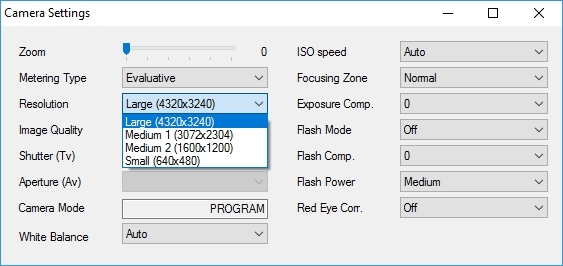
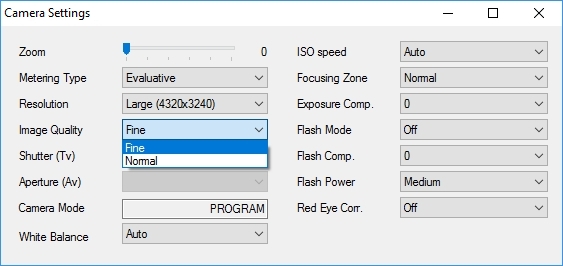
Image Quality sets the image compression (constriction) coefficient. The higher compression level, the lower image volume and detailization. Therefore, the less compression is, the higher is the image quality. However, in this case, the image requires more space on the camera memory card. And vice versa: the higher compression level is, the lower is the image quality, but you save some memory card space.
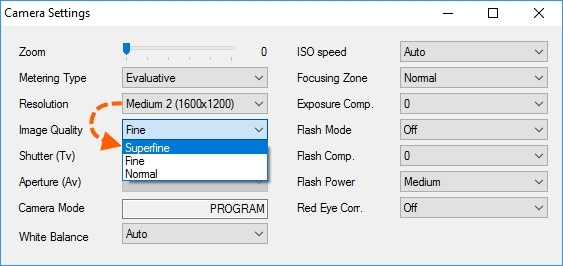
For the Medium2 and Small shot size, you can set the Superfine shot quality. This value ensures the lowest image compression level.
The Superfine value is only available for setting via the inPhoto Capture PS interface; you cannot access it via the camera menu.
The shot size and quality affect image processing speed and its transferring speed via TWAIN-connection. The bigger size and lower compression level, the lower speed of image processing and transferring to a third-party application. And vice versa, the smaller size and higher compression level, the higher speed of image processing and transferring via TWAIN-connection to a demanding application.
Shutter (Tv) is a value of time-exposure. The setting is available in the Shutter priority (Tv) and Manual (M) camera's modes. Changing time-exposure will let you control the time of making a shot. The time-exposure values are given in fractions of a second, and then 1/10 of a second is more than, for example, 1/400.
They usually use a short time-exposure for shooting moving objects: playing child, flying bird, running water etc. That way the image is fixed almost instantaneously, and so, you can catch a moment in the moving of the object.
A long time-exposure will make moving objects fuzzy. This method is used to get interesting artistic effects, for example, headlamps light of passing cars will turn into magic fire tails, and walking people shapes will become half-transparent.
They also use large values of time-exposure for shooting with lack of light because of cloudy weather or night time.

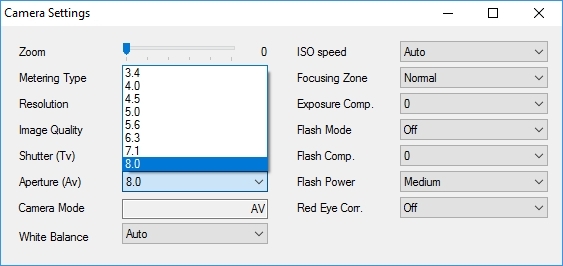
Aperture (Av) is a value of aperture. The setting is available in the Aperture priority (Av) and Manual (M) camera's modes. A change in the aperture opening will let you control the depth of field of the image.
 The depth of field is a zone of the image with maximal detailization (sharpness). In the image with important depth of field, you will have sharp the front view, the mid-distance view, and the background. The image with low depth of field will be fuzzy all over the surface except the focal point.
The larger the aperture number is, the higher is the depth of field of the image. Important values of aperture are used for shooting scenery where both the close and the distant objects will be sharp.
The less the aperture number is, the larger is the difference between the sharp front view and the fuzzy background of the photo. They often use an open aperture to make portraits when you need to emphasize the face or the look without attracting attention to the background. Moreover, a fuzzy background itself may become an artistic idea of your photo.
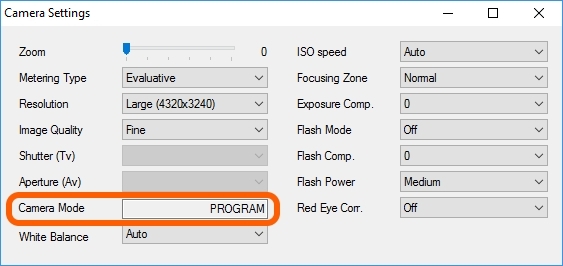
Camera Mode indicates the current mode of the camera. inPhoto Capture PS interacts with the camera in the Auto (A), Program (P), Aperture priority (Av), Shutter priority (Tv), and Manual (M) modes.
White balance is a parameter determining correct color reproduction on the image. The way you set the White Balance determines how close the colors of the image will be to the original colors of the target object. If the setting is incorrect, the image may have blue, green, yellow, red or other non-natural tone. The day light, for example, brings a blue tone to the image, the fluorescent light brings a green tone, the light of incandescent lamp brings a yellow tone, and the live fire light brings a red tone.
You can choose a white balance value for various light environments from the value list present in the camera settings.
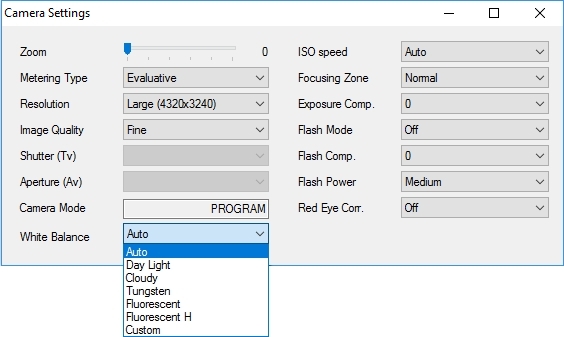
Auto - automatic setting of the optimal white balance for specific shooting conditions.
Day Light - for shooting outdoors in fine weather.
Cloudy - for shooting outdoors in cloudy weather, in shadow or in dusk.
Tungsten - for shooting with fluorescent light or light of bulb incandescent lamp (3 waves).
Fluorescent - for shooting with warm-white light, cold-white light or warm-white fluorescent (3 waves) light.
Fluorescent - for shooting with fluorescent day light lamps or with fluorescent day light lamps (3 waves).
Custom - for manual setting of the white balance.
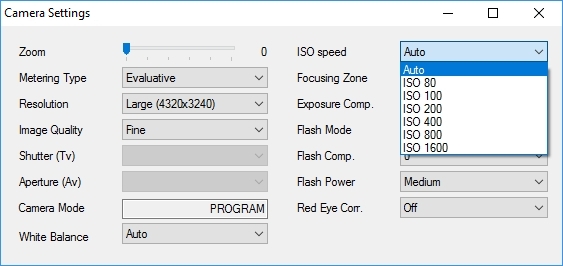
ISO speed is a light-sensitivity of the camera's matrix. The higher ISO is, the less light you need for shooting and the higher is level of distortion (noise) of the image. The high quality image is easier to get with less values of ISO. Lack of light may be compensated with aperture opening or increasing time-exposure.
Auto is an automatically calculated number of ISO according to the lighting conditions and the shooting mode.
80 - 200: for shooting outdoor in fine weather
400 и 800: for shooting in cloudy weather or in dusk.
1600: for shooting night scenery
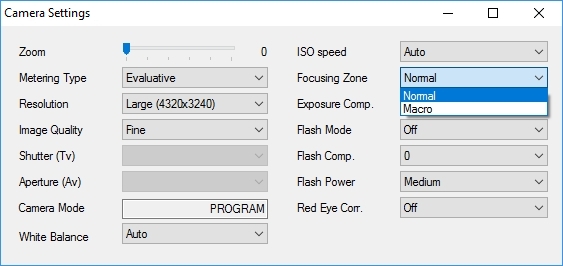
Focusing Zone is a shot zone which the camera will focus on.
Normal is for automatic focusing. In this mode, the camera usually focuses on the nearest object or on the zone with the maximal contrast.
Macro is for close-up. In this mode, the camera can focus on the objects that are closer than in case of the automatic focusing.
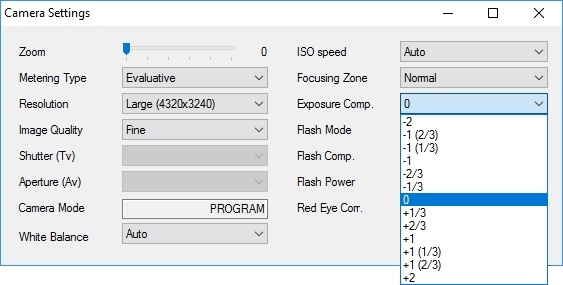
Exposure Comp. (or exposure compensation) allows correcting the exposure. If, while using the automatic exposure, your shots are too dark or conversely light-struck, you can correct it manually by changing the value of exposure.
To make your photo lighter, set a positive exposure compensation (+ 1/3, +1 etc.), and to avoid light-struck photos, set negative values of exposure compensation (- 1/3, -1 etc.).
Flash Mode determines conditions of flash activation.

text
The flash is an additional source of light that applies when there is a lack of natural light or necessity to modify it to get the target object with good quality.
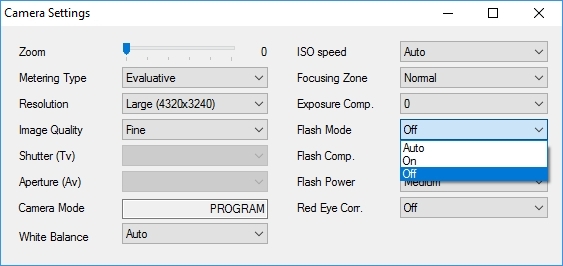
Auto - the flash works automatically when the lightness level drops down under a predefined threshold.
On - the flash works in all cases whatever light conditions take place.
Off - the flash is deactivated.
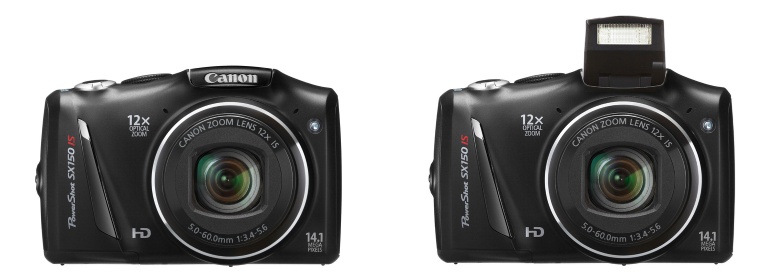
Please note that on most cameras the flash unit cannot get up itself if it has not been open manually on the camera body. If you would like to shoot with flash and you have switched the Flash Mode parameter to On or Auto, please don't forget to get up the flash unit. Here below, on the left, you can see a camera with closed flash unit, and on the right, a camera with the open one.
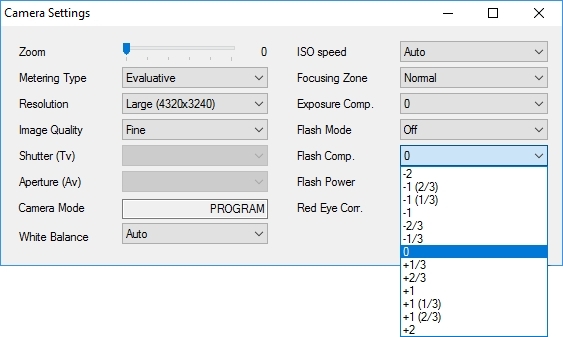
Flash Comp. allows correcting automatic value of flash intensity. This option is used to balance flash light and daylight.
If the flash has not lighted enough the main object in the test shot, set a positive compensation (+1/3, +1 etc.), and if the flash light is conversely too bright, set a negative value (-1/3, -1 etc.).
The Flash Power is determined by the distance at which the flash is able to light the surrounding space.
text
The flash light distance also depends on the zoom position. This is why the same flash intensity combined with different zoom positions will result to space lighted for different distance.
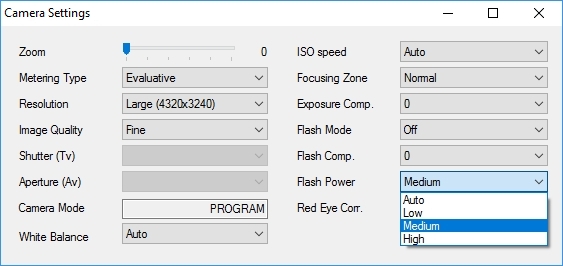
The Low, Medium, High values allow to set the flash intensity manually.
The Auto value means the camera automatically sets the flash intensity depending on the lightness conditions and distance to the target object.
Red Eye Corr. prevent red-eye effect on the images made with flash.
 The red-eye effect occurs because of the flash light reflects from retina and brings back via pupil. The larger eye pupils open, the more evident will be the red-eye effect on the images. In the course of shooting, the flash and image capturing are made so fast that the pupil cannot react and shrink, it passes through too much of light coming from the flash. If the red-eye correction function of the camera is switched on, the flash snaps into action twice when you shoots. The first time occurs some time before shooting and the second time takes place just in the course of shooting. This interval between the two flashes allows the pupil to shrink. A narrow pupil passes through inside the eye much less of light and almost does not reflect it from the inside of the eyeball. This function therefore allows to avoid the red-eye effect on images.
On - red-eye correction activated.
Off - red-eye correction deactivated.