Take the following steps to connect your camera to a PC and pass the camera control to inPhoto ID PS:
1. Switch the camera to automatic (AUTO) or program mode (P).
 Depending on the model, the camera mode is switched either using the mode dial or from the camera menu. If the mode is set from the camera menu, it should be switched before the memory card with the application module is inserted into the camera. After the application module is started, the camera control elements will be locked and you will not be able to switch mode from the menu. In this case, you will have to remove the memory card from the camera to switch mode.
2. Insert the memory card with the pre-installed PS Module into the camera. Make sure the card is locked, otherwise the camera will not start the application module.
The way of preparing the card to working with inPhoto ID PS is described in the Memory Card Preparation chapter.
3. Make sure that the camera batteries are charged or the camera is connected to a power source.

text
We recommend connecting the camera to a power source for trouble-free functioning.
4. Connect the camera to the PC which inPhoto ID PS is installed on using a USB cable.
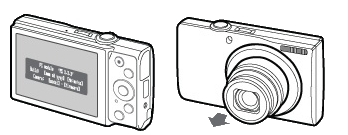
5. Switch the camera on. The application module window will be displayed on the camera screen for several seconds, then the camera screen will go off and the camera lens will extend. That means the application module has been successfully started and the camera is ready to pass control to inPhoto ID PS.

If it has not happened, then the application module was unable to start up and the camera cannot be controlled via application. There may be two reasons for such behaviour:
1.The memory card is unlocked. In this case, switch the camera off, remove the card and lock it. Then, re-insert the card and switch the camera on.
2.The card is incorrectly prepared. In this case, clean the card and repeat the preparation procedure. It should be reminded that the card preparation is described in the Memory Card Preparation chapter.
6. Start inPhoto ID PS. In a couple of seconds, the application will initialize the camera and you will see the image received from the camera in the application preview. Since that moment, you can control the camera via inPhoto ID PS.

text
After the camera control is moved to inPhoto ID PS, all the buttons and other control elements on the camera body will be inactive except the shutter release button and the zoom lever.
See information on the inPhoto ID PS settings and functions for working with a camera in the Camera chapter.