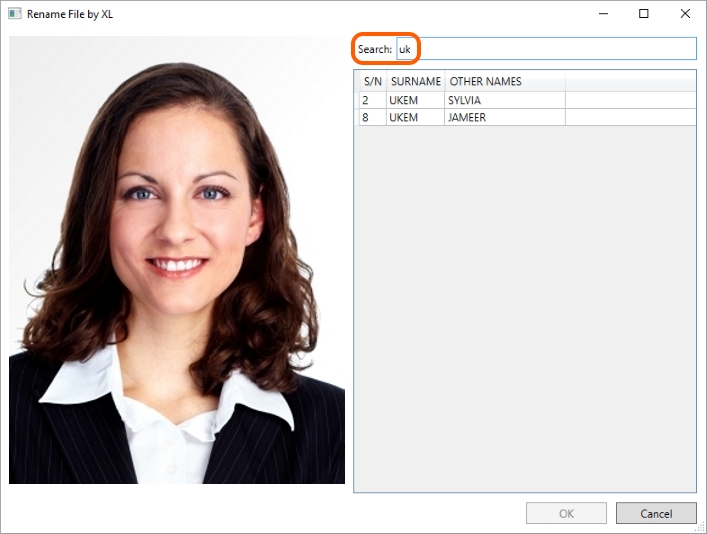
When you are opening RenameFileByXL, the Search field is automatically gaining the focus. Please start to enter in this field the second name of the student whose record you need to find.

If the table contains only one record corresponding to the inquiry, just press OK and the photo file will be renamed.
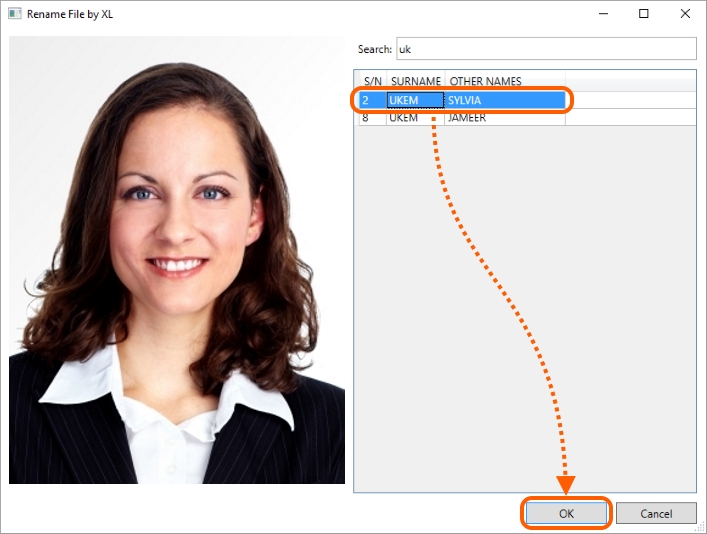
If the table has several lines indicated, highlight the necessary one manually. After that, the OK button becomes accessible. Press it and the photo file will be renamed.

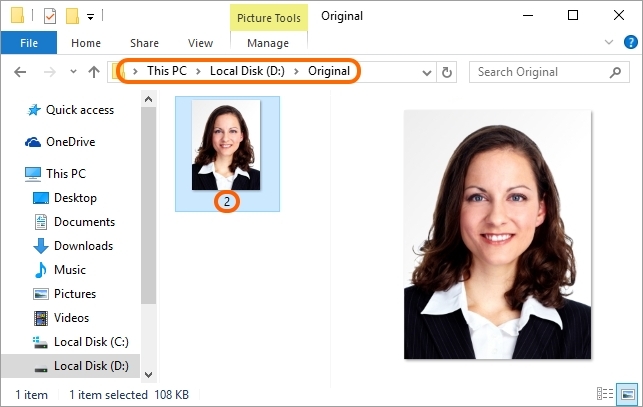
Open the folder indicated for storing renamed files and check the result of renaming.
In our example, the number 2 corresponds to the second name UKEM. As you can see on the image below, the file name has changed from 001 to 2.
